|
Recently in DDA II, we've been working with lighting and how lights interact with objects in 3DS Max. Our most recent project, which had to be completed at home due to the coronavirus, involved working with the Arnold Renderer and the Arnold lighting system. Arnold lights are versatile and appear to be photorealistic, and I personally really like how my final scene turned out. The only problem that I have with them, and the Arnold Renderer in general, is the fact that it takes a really long time to fully render. A preview pass takes an upwards of three minutes, which is fine, but my full render for the scene took around 3-4 hours, but it looks incredible. Below are two renders I made of my scene- one of the preview passes, and the full render, which I'm really proud of. The preview passes are grainy at best, but give a good idea of what the full scene really looks like. Overall, I really like Arnold lighting, but rendering takes a really long time, which can be a problem if I'm working on a school assignment. 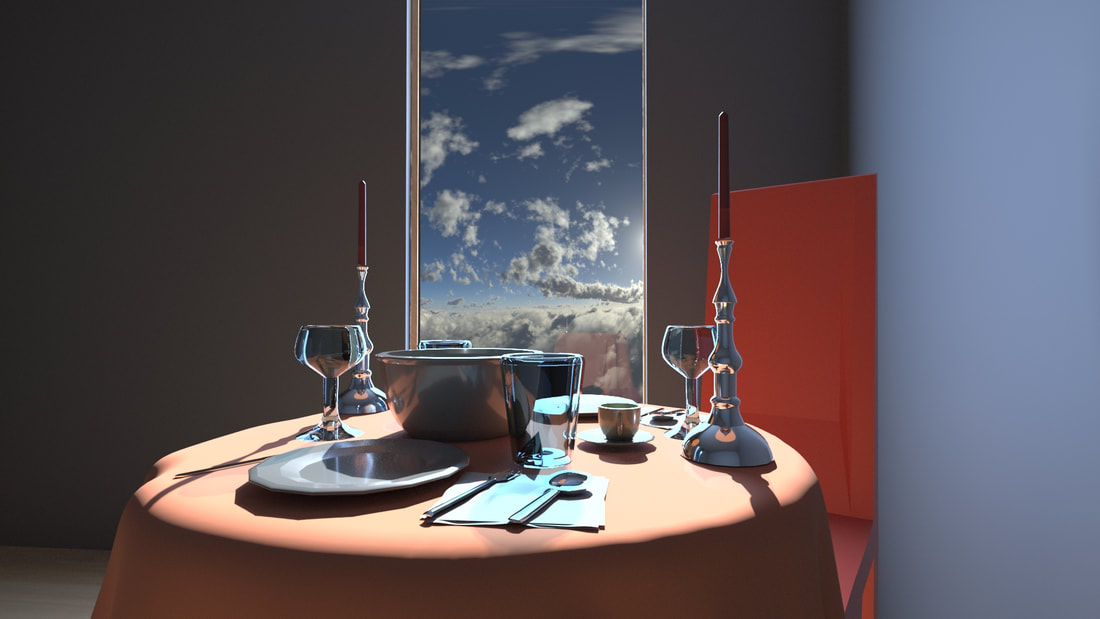 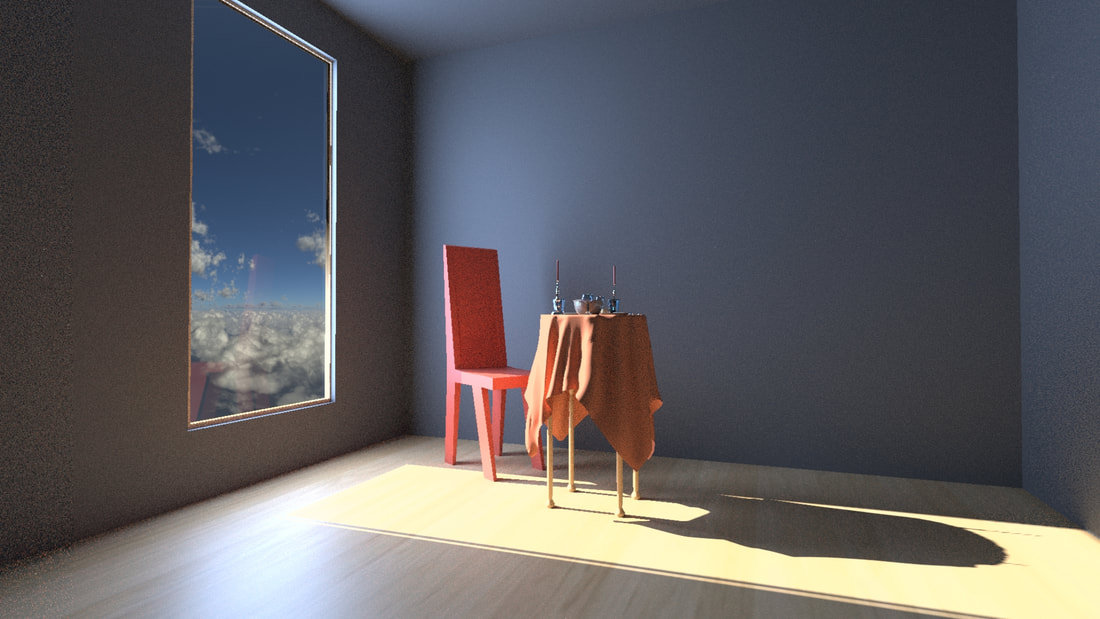
0 Comments
Recently in DDA, we've been learning about UVW mapping and texturing on 3D objects. So far we've learned that it's a difficult, tedious, and hard process, and a lot can go wrong with it. The amount of content we had to learn to texture a single can is hard to believe- it took me about a week of straight work, and then some, to make this: 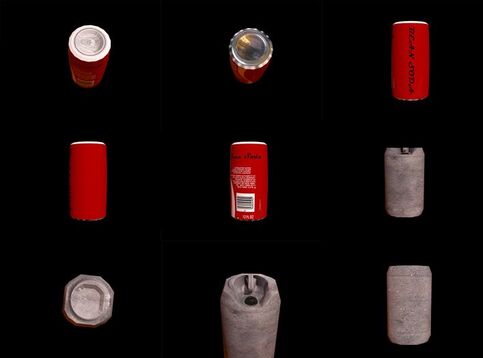 They're not even all that good. The process is cool in concept, where you slice a mesh along a series of vertices to apply a seamless texture, but if you try to work with anything more complicated than a box, it gets so difficult and tedious that it's barely even worth it. All in all, it's probably a skill we need to have in this class, but that doesn't change the fact that I don't like it.
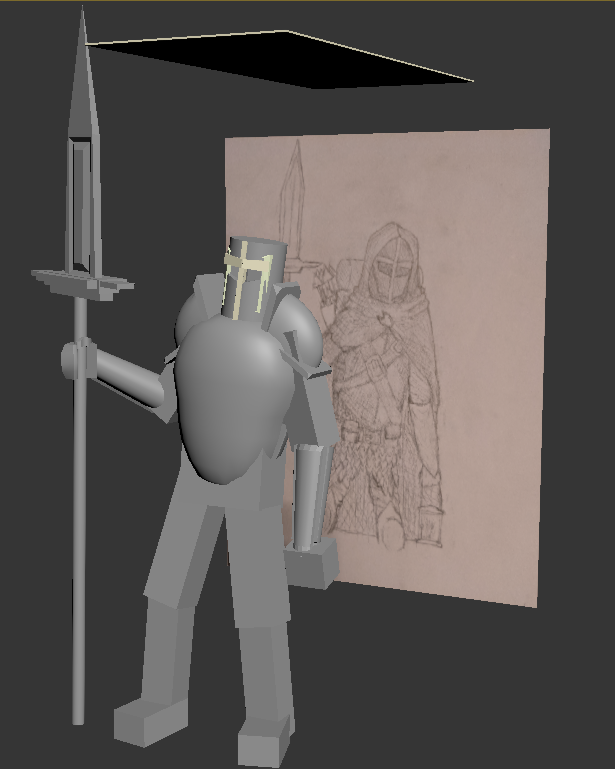
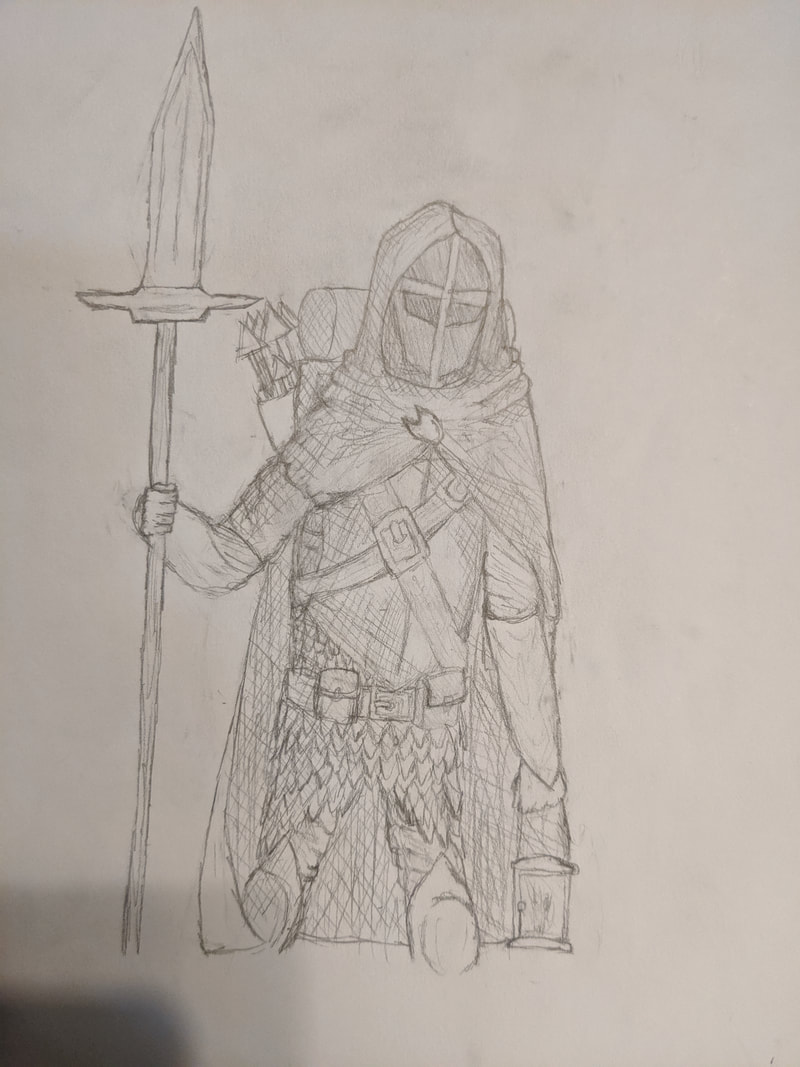
Over the course of my winter break, I finally took the time to finish my character model. I added details to the legs, I added a cape, and did some other stuff to make it look like a finished project, including an overhaul of the backpack, and I added a pedastal for him to stand on. I'm proud of how it turned out- I like how I used the reference image to pose him the way I did, and while the level of detail isn't great, I think that it'll be easier to print out in the end. Below you can see some low-quality renders I did- after I was done with the model itself, I messed around with some lighting and materials to show off what I did. Finally, I simply scaled it down to the size of a standard mini (1 in. x 1 in. x ~28 mm.) for printing later on. I did run into a problem while doing this- the spear made it taller than most minis, making it stand at around 38 mm. instead of 26-28 mm. I fixed this by scaling it down a small percentage, making the base somewhat smaller than 1 in., but in keeping the proportions the same, the height was put at about 32 mm., which was a lot better than 38 mm. I thought this was pretty good, and so I saved it as a copy, leaving me with two files- the original, and the one scaled for 3D printing. When I get back to school, I'll share both versions with my teacher, and see about printing it. Overall, this project was a lot of fun, and I'm actually excited to work on more things like it in the future. 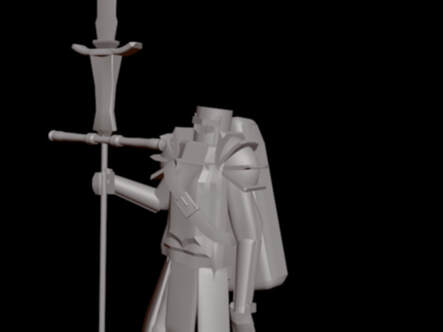 For the past month or so, I've been creating a 3D model of a character design that I drew. I'm making it to hopefully be 3D printed, and so far, I've made some great progress. I really like how it looks so far, and I'm nearly done with it- hopefully, I'll be able to work on it at home over Thanksgiving break this week, and maybe even finish it. I've drawn a few inspirations for the design- I only recently redid the spear, which is inspired from the game Dark Souls. I'm really proud of how it turned out, and I think it's a major improvement over my old spear design, which was pretty poorly modeled. I also redid the chestplate, making it look a slightly more detailed, and it looks like it actually fits with the pauldrons, which have also been redone. All I really need to now it the legs, feet, and skirt, and the pedestal on which the figure will stand. I'll then make the cape using the cloth modifier, and finally scale it all to the right size in centimeters. All in all, I'm really excited to see where this goes.
Compound Objects are a subset of tools in 3DS Max that are used to combine or create two or more objects into one. Examples of this are Boolean and Proboolean, which are used to combine two shapes in some way- Be it combining them, removing one's volume from the other, or removing the intersecting volume. That in itself is incredibly useful, but my favorite tool of the few that we've used so far has to be the terrain tool.
The terrain tool isn't as versatile as something like Boolean, but what for what it is, it is amazing. You create contour lines using 2D splines, and then use the terrain tool to create terrain shaped to those contour lines. It's perfect for something like a video game scene, or to just create a mountain if you're bored. The tool has options that affect how it's shaped, and how smooth it is. The simple fact that it uses contour lines makes it so much more efficient and easy to use than it would be otherwise. You can make the walls sheer and flat, or gradual, much like a hill. You can choose to add more polygons, cramping computer resources, but making it slightly smoother, and possibly some weird geometry. All in all, the terrain tool is one of my favorite things to use in 3DS Max. It's sheer efficiency and ease of access makes it simple to pick up on the spot, and while it's not super versatile like Boolean, Blobmesh, or Scatter, it was made to do one thing, and that thing is to make terrain, which it does indeed do. In Summary...
|
AuthorHi! I'm Thomas MacDougall, a sophomore at DSA. Here you can check out my thoughts and recent activities. Please note that the views and opinions expressed in this blog are solely those of the author and do not represent those of Durham School of the Arts or Durham Public Schools. Archives
March 2020
Categories
All
|
 RSS Feed
